Soups & Stews
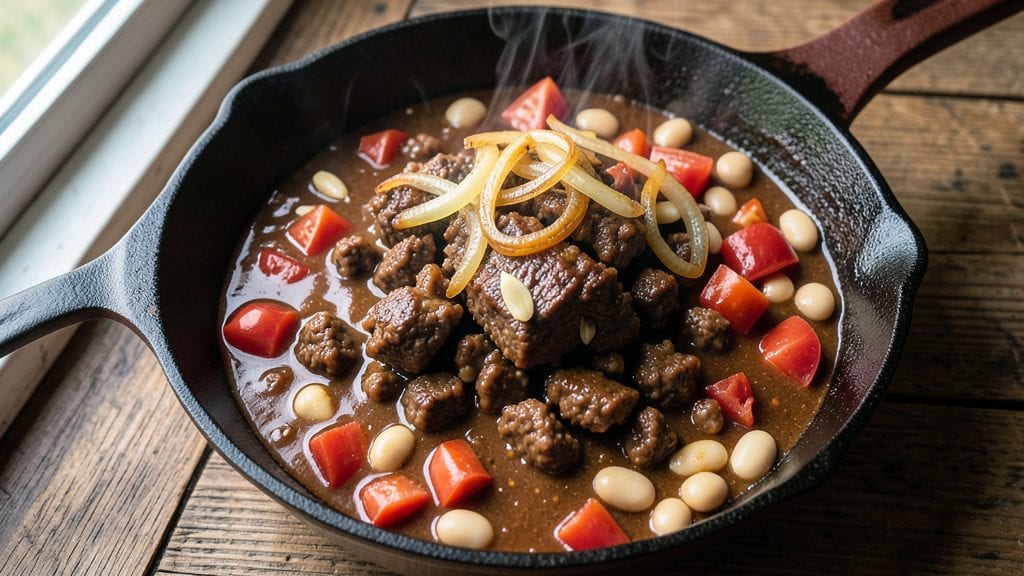
This Mom's chili recipe brings back the cozy, meaty, bean-rich chili that made family dinners unforgettable—deep flavors built through slow simmering and careful layering. The secret lies in browning the meat first, which develops that rich, caramelized depth that separates homemade from canned.
I’ve perfected this version over years of holiday gatherings, where it disappears faster than the cornbread on the side.
What makes this chili special is the balance: tender chunks of beef, hearty kidney beans, and tomatoes that simmer until their acid softens into sweetness. The spices—cumin, chili powder, and a pinch of cinnamon—create warmth without overpowering, while the beef broth keeps it rich and satisfying.
It’s the kind of dish that tastes even better the next day, when flavors meld into perfect harmony.
By the time you’re done, you’ll have a pot of chili that’s thick, aromatic, and packed with texture—crisp edges on the beans, tender meat that falls apart, and a sauce that clings to every spoonful.
The aroma alone will have everyone gathering around the table, and the first bite delivers on that nostalgic comfort food promise.
Serve it with crusty bread, shredded cheese, or a dollop of sour cream for the full experience. This chili is the kind of recipe that becomes a tradition—simple enough for weeknights but hearty enough for company. Let’s get simmering.
Ingredients for mom's chili
Sixteen ingredients for a chili that tastes like home—deep, meaty, and full of nostalgic warmth.
| Ingredient | Amount | Notes |
|---|---|---|
| Ground Chuck Beef 🥩 | 2 lb | 80/20 fat ratio preferred |
| Kidney Beans 🌿 | 2 cups | Canned, drained and rinsed |
| Diced Tomatoes 🍅 | 2 cups | Canned, fire-roasted preferred |
| Beef Broth 💧 | 3 cups | Low-sodium preferred |
| Yellow Onion 🧅 | 1 whole | Diced, medium size |
| Garlic Cloves 🧄 | 4 cloves | Minced, fresh preferred |
| Chili Powder 🌶️ | 2 tbsp | Medium heat preferred |
| Ground Cumin 🌿 | 1 tbsp | Toasted for deeper flavor |
| Ground Coriander 🌶️ | 1 tsp | Adds subtle citrus note |
| Cinnamon 🌳 | ½ tsp | Warmth without overpowering |
| Bay Leaves 🍃 | 2 whole | Remove before serving |
| Salt 🧂 | 1 ½ tsp | Adjust to taste |
| Black Pepper 🌶️ | ½ tsp | Freshly ground preferred |
| Olive Oil 🫒 | 1 tbsp | For browning meat |
| Tomato Paste 🍅 | 1 tbsp | For thickening and depth |
The beef is non-negotiable—ground chuck with 80/20 fat ratio gives you that rich, caramelized depth when browned. Costco or local butcher sections usually have the best prices for bulk packs, but the regular grocery store stuff works fine if it's fresh. Look for bright red color and good marbling—none of that grayish, dry stuff. I always grab extra because it freezes perfectly. The kidney beans? Canned is fine, but if you're feeling fancy, soak and cook dried for even better texture. Fire-roasted diced tomatoes add that smoky sweetness that makes this chili special—Muir Glen is my go-to, but any good brand works.
No chili powder? Mix 1 tbsp smoked paprika with 1 tsp cayenne for a similar kick. Running low on cumin? Ground coriander at double the amount gives a similar earthy warmth. The cinnamon might seem odd, but trust me—it rounds out the flavors without overpowering. Trader Joe's has great spices in bulk, and their bay leaves are always fresh. For the tomato paste, squeeze tubes are perfect—no waste, and they keep for months. The onion and garlic can be prepped ahead (I usually do this while the meat browns), and the spices should be freshly ground if possible—pre-ground loses flavor fast.
This chili tastes even better the next day, so double the batch if you're feeding a crowd. Keeps for 5-6 days in the fridge, freezes for up to 6 months—just thaw overnight in the fridge. I always make a big pot on Sundays and portion it into containers for the week. The flavors meld beautifully over time, so don't rush it. If you want to serve it immediately, let it sit for at least 30 minutes after cooking—gives everything time to settle and the flavors to marry.
Why You'll Love This Recipe
- One-Pot Magic: I swear by this recipe because it’s literally one pot—no chopping mountains of veggies, no multiple pans, just brown the beef, toss in the onions, and let it simmer. The onions caramelize right in the broth, adding this deep, sweet base that takes zero extra effort.
- Rich Without Fuss: Between the beef broth and those diced tomatoes, this chili has this perfect balance of hearty and tangy. The kidney beans soak up all the flavor, so you don’t even notice they’re there—just pure, satisfying depth. Honestly, the first time I made it, I thought, "Wait, this is just… good?"
- Game for Any Day: I’ve served this at tailgates, packed it for lunch the next day, and even reheated it for dinner when I was too tired to cook. It’s the kind of dish that works with cornbread, over rice, or straight from the pot with crackers—no judgment. My roommate’s a picky eater, and even he asks for seconds.
- Budget-Buster Leftovers: A pound of ground chuck stretches forever in this recipe, and the beans make it filling without breaking the bank. I’ve fed six people for under $15, and it still tastes like a restaurant meal. Plus, it reheats like a dream—better the next day, if you ask me. (Yes, even on a Tuesday night.)
Step-by-step instructions for Mom's chili recipe
Here's how to make this comforting chili that's perfect for feeding a crowd.
Brown the Ground Chuck Beef
Heat the olive oil in a large Dutch oven or heavy pot over medium-high heat. Add the 2 lb ground chuck beef and break it apart with a wooden spoon. Cook until the meat is no longer pink and the edges are nicely browned—this should take about 5-7 minutes.
Don't rush this step. The meat needs to brown properly to develop deep flavor. If you notice the meat is browning too quickly and smoking, reduce the heat slightly. Once fully browned, drain most of the fat but leave about 1 tablespoon in the pot—this fat will help build flavor as the chili simmers.
Sauté the Aromatics
Add the diced yellow onion and minced garlic cloves to the pot with the browned beef. Cook for 3-4 minutes until the onions are softened and translucent. You'll smell that wonderful garlic aroma—this is where the chili starts to come together.
Here's where it gets good. Stir in the tomato paste and cook for another 2 minutes, allowing it to darken slightly. This step deepens the chili's flavor profile by caramelizing the tomato paste. The paste will thicken and develop a slightly bitter edge that balances the sweetness of the tomatoes.
Add Spices and Liquids
Pour in the 2 cups of diced tomatoes, 3 cups of beef broth, and all the spices: 2 tbsp chili powder, 1 tbsp ground cumin, 1 tsp ground coriander, 0.5 tsp cinnamon, 1.5 tsp salt, and 0.5 tsp black pepper. Add the 2 whole bay leaves and stir everything together. Bring the mixture to a gentle boil.
Once boiling, reduce the heat to low and let it simmer for 10 minutes. This initial simmer helps the spices bloom and infuse the broth with flavor. You'll notice the chili starts to thicken slightly and the aroma becomes more complex. If it looks too thin at this point, don't worry—it'll thicken more as it cooks.
Incorporate the Kidney Beans
Add the 2 cups of drained and rinsed kidney beans to the pot. Stir gently to combine with the other ingredients. The beans will absorb some of the liquid, but you want to maintain a hearty consistency—this chili should be thick enough to coat the back of a spoon but still have some body.
Return the chili to a gentle simmer and cook uncovered for 30-40 minutes. Stir occasionally to prevent sticking. You're looking for a chili that's thick and rich, with flavors that have melded together beautifully. The beans should be heated through and the meat tender.
Finish and Serve
Remove the 2 bay leaves before serving. Taste the chili and adjust the seasoning if needed—you might want to add a bit more salt or a touch of chili powder to suit your preference. The chili should be rich, slightly sweet from the tomatoes, and have a nice balance of heat and earthiness from the spices.
Let the chili sit for 10 minutes before serving. This resting time allows the flavors to settle and the chili to thicken slightly. Serve it hot with your favorite toppings like shredded cheese, sour cream, or chopped green onions. This chili is even better the next day as the flavors continue to develop.
Pro Tips For Making Mom'S Chili
- CRISP THE ONION FIRST: I learned this the hard way—skipping this step means your chili will taste like you forgot to season the onions. Sauté that yellow onion in 2 tablespoons of oil over medium-high heat until it’s soft but still has a little bite, about 5-6 minutes. The deeper caramelization happens later, but starting here builds flavor that actually carries through the whole pot.
- BROWN THE BEEF IN BATCHES: High heat. Seriously, crank it up and cook the ground chuck in 1-pound chunks until it’s dark brown, not just pink. Crowding the pan steams the meat instead of searing it, and that’s when your chili turns out gray and bland. A busy pan means better flavor—just don’t walk away.
- SALT THE BEANS BEFORE ADDING: Sounds weird, but it works: Toss the kidney beans in a pinch of salt and a splash of broth before they hit the pot. This keeps them from turning mushy later—salting them early helps them hold their shape. (Yes, even if you’re impatient like me.)
- SIMMER LOW AND COVERED: After everything’s in the pot, drop the heat to a bare simmer and let it cook uncovered for the first 20 minutes. Then, cover it and walk away. The initial uncovered time helps thicken the broth, and covering locks in moisture so your chili doesn’t dry out by the end. —I know, I know, but trust the process.
Perfect pairings for this recipe
Classic Toppings
No chili is complete without the right toppings to add texture and freshness. I always keep shredded cheddar cheese (about ½ cup) and sour cream (about ¼ cup) on hand—they add creaminess that balances the hearty flavors.
For a little crunch, sprinkle chopped green onions or cilantro right before serving. A dash of hot sauce (like Tabasco) lets everyone adjust the heat to their taste. 🧀
Bread Pairings
This chili deserves a sturdy bread to soak up every last drop. Warm cornbread is a must—its slight sweetness complements the chili perfectly. For a heartier option, serve with crusty sourdough or freshly baked dinner rolls.
I like to make a big batch of cornbread and freeze half for later—it reheats beautifully in the oven. 🍞
Drink Recommendations
A cold Mexican lager like Modelo Especial cuts through the richness of the chili beautifully. For something lighter, a crisp white wine such as Sauvignon Blanc (think Kim Crawford) adds a refreshing contrast.
If you prefer beer, a hoppy IPA (like Fat Tire) can stand up to the bold flavors. 🍺
Side Dish Ideas
For a full meal, serve this chili with steamed rice or crusty bread to round out the plate. A simple green salad with a tangy vinaigrette adds freshness. I also love pairing it with baked tortilla chips for scooping—it’s a fun way to let everyone customize their bowl. 🥗
Make-Ahead Additions
If you're prepping ahead, add cooked ground turkey or crumbled bacon just before serving to keep the toppings fresh. For extra depth, stir in avocado slices or pickled jalapeños right before eating. These additions add brightness and keep the dish exciting even after reheating. 🌶️
Nutrition facts
Frequently asked questions
Can I make this chili without meat?
Swap the beef for 2 cups cooked lentils or 1 lb extra-firm tofu (crumbled and pan-fried). For texture, add 1 cup mushrooms or bell peppers sautéed with the onions. The spices and tomatoes will still create that rich, hearty flavor—just reduce the broth to 2 cups to maintain thickness.
Why does my chili taste too acidic?
Acidity often comes from overusing canned tomatoes or not balancing flavors. Try adding 1 tbsp tomato paste (cooked down) or a pinch of sugar to mellow the acidity. For depth, stir in ½ cup beef broth and simmer 10 minutes longer. A splash of apple cider vinegar (just ½ tsp) can also help round out the flavors.
How do I fix chili that's too thin?
Thin chili happens when too much liquid is added. Simmer uncovered for 15-20 minutes to reduce naturally. For instant thickening, mix 1 tbsp cornstarch with 2 tbsp cold water, stir into the chili, and cook 5 minutes more. Alternatively, mash ½ cup beans directly into the pot—the starch releases and thickens the sauce.
Can I use dried beans instead of canned?
Yes! Soak 1 cup dried kidney beans overnight, then cook until tender (1-1.5 hours in fresh water). Drain and rinse before adding to the chili. For faster prep, use the quick-soak method: boil beans for 2 minutes, then let sit off heat for 1 hour. Adjust broth to 3.5 cups since dried beans absorb more liquid.
What’s the best way to reheat leftovers?
Reheat gently on the stove over low-medium heat for 10-15 minutes, stirring occasionally. For even heating, transfer to an oven-safe dish, cover with foil, and warm at 350°F for 20 minutes. Avoid microwaving—it can make the chili watery. Stir in 1 tbsp broth if needed to restore thickness.